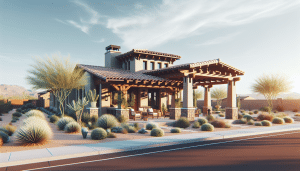
Are you tired of the Arizona sun turning your backyard into an oven? Our ultimate DIY guide to custom Shade Sails provides the perfect solution! Tailored for homeowners like you, this guide will help transform your outdoor space into a cool, comfortable oasis.
Contents
- 1 Understanding Shade Sails
- 2 The Benefits of Installing Shade Sails
- 3 Choosing the Right Shade Sail Material
- 4 Measuring Your Space
- 5 Designing Your Shade Sail Layout
- 6 Installing Anchor Points
- 7 Rigging Your Shade Sail
- 8 Maintenance Tips for Longevity
- 9 Common Mistakes to Avoid
- 10 Resources and Support from Arizona Shade Sails
- 11 Tools and Supplies Checklist
- 12 Conclusion
Understanding Shade Sails
Shade sails are a versatile and stylish solution for creating shaded areas in your outdoor space. These Fabric canopies are both attractive and functional, making them an ideal choice for homeowners looking to add a modern touch to their yards.
Not only do they offer protection from the sun, but they also enhance the aesthetic appeal of your property. By learning more about shade sails, you’ll be better equipped to choose the right one for your needs.
The Benefits of Installing Shade Sails
Adding shade sails to your outdoor area comes with multiple benefits. First, they provide relief from the intense sun, keeping your patio, garden, or pool area cooler and more comfortable.
Furthermore, shade sails can protect your outdoor furniture from sun damage and fading, ultimately prolonging their lifespan. This not only saves you money but also keeps your space looking fresh and inviting.
Choosing the Right Shade Sail Material
Selecting the correct material for your shade sail is crucial to ensure durability and longevity. Common Materials include high-density polyethylene (HDPE) and waterproof fabrics, each offering unique benefits.
HDPE is breathable and allows airflow, reducing the temperature beneath the sail. Waterproof fabrics are excellent for areas where rain protection is a priority, offering a versatile solution for all weather conditions.
Measuring Your Space
Accurate measurement is key when installing shade sails. Begin by sketching a layout of your outdoor area, marking potential anchor points for your sail.
With a tape measure, record the distances between these points to ensure your shade sail fits perfectly. Measuring carefully will save time and avoid the frustration of purchasing an incorrect size.
Designing Your Shade Sail Layout
Once you’ve measured your space, consider how various layouts will impact your Design. Think about shading specific areas like seating or play spaces for maximum comfort.
Experiment with different shapes and angles, as this can enhance both functionality and visual appeal. A well-planned layout can turn your backyard into a stunning and practical retreat.
Installing Anchor Points
Secure and reliable anchor points are essential for a sturdy shade sail Installation. These can include existing structures such as walls and beams or purpose-built Posts.
Ensure all anchors are installed at an angle to prevent water pooling on the sail. This step is vital for both the safety and effectiveness of your shade sail investment.
Rigging Your Shade Sail
After securing the anchor points, it’s time to install your shade sail. Start by attaching the corners of the sail to the selected anchors using durable turnbuckles or shackles.
Adjust the tension to avoid wrinkles or sagging. A taut sail not only looks better but also provides more effective shade and resists wind uplift.
Maintenance Tips for Longevity
Proper maintenance ensures your shade sail will last for many seasons. Regularly check the tension and anchor points, tightening as necessary to maintain the sail’s shape.
Cleaning the fabric with a gentle detergent and water mix can prevent dirt and stains from settling in, preserving the appearance and integrity of your sail.
Common Mistakes to Avoid
Installing a shade sail may seem straightforward, but there are common pitfalls to watch out for. One mistake is failing to account for the movement of the sun, leading to ineffective shading.
Another error is choosing a low-quality fabric that won’t withstand the elements. Ensuring high-quality materials and careful planning will save you hassle and create a reliable outdoor setup.
Resources and Support from Arizona Shade Sails
At Arizona Shade Sails, we’re committed to helping you every step of the way. Our team offers professional advice and high-quality products to make your DIY project a success.
Whether you need guidance on material selection or installation techniques, we’re here to ensure your outdoor area shines beautifully under its new shade sail.
Tools and Supplies Checklist
- Tape Measure: Essential for accurate measurements and ensuring your sail fits as planned.
- Turnbuckles and Shackles: These provide the necessary Hardware for securing your sail’s corners to anchor points.
- Drill and Drill Bits: Required for installing anchor points and ensuring they’re secured properly.
- Ladder: A must-have for safely reaching high anchor points during installation.
- Shade Sail Fabric: Choose from HDPE or waterproof options to match your weather needs and preferences.
Conclusion
With our comprehensive guide, you’re well on your way to creating a cool, shaded paradise right in your backyard! If you have any questions or need further assistance, please call us at 480-418-8438 or Request a Free Quote today.


